3D Scanning My Rav4
October 2020 - December 2020
Summary
During COVID I thought it would be a fun side project to make accessories for my car, starting with a ladder for the back. But when I dove into SolidWorks, I thought about how much easier the project would be if I had a 3D model of my car. So explored the internet to see what cheap options were out there for DIY 3D Scanning.
Surprisingly, I ended up finding multiple options! The next question to answer was which one is best for this project? So I started sampling and comparing.
Option 1: Xbox Kinect
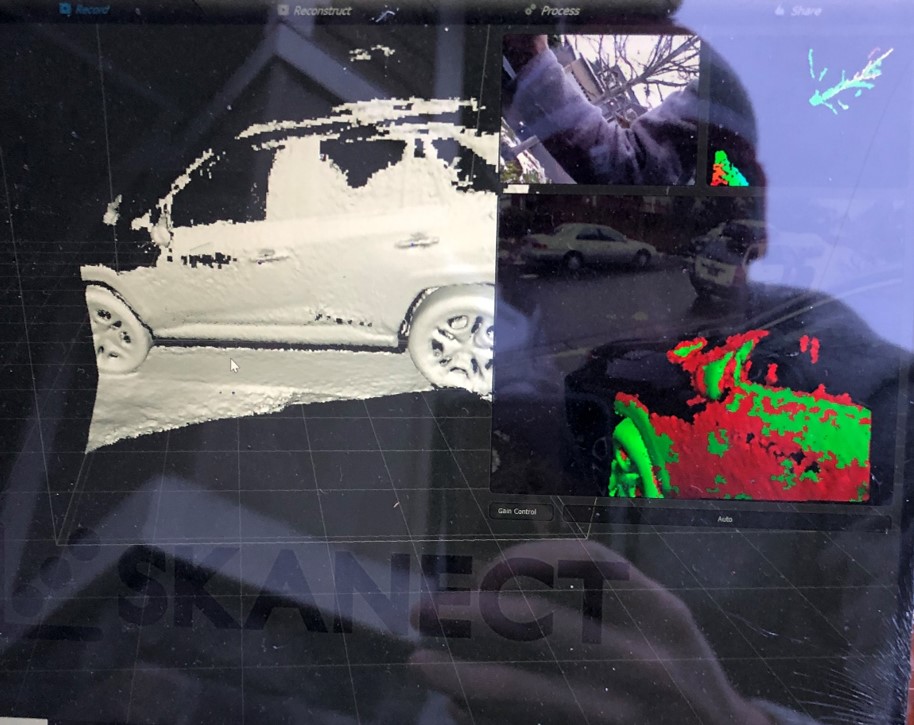
Lucky for me I already had access to both an Xbox Kinect 1 and 2. I found online that people have used the Kinect 1.0 with a software called Skanect. It was a free program to tryout but it would cost money to download files and import them into CAD.
The cool thing about this was the live tracking. The image would show green for where you have scanned accurately and the red would be areas that it missed or need rescanning. This method was also very quick for an object as large as my car.
Next I tried the Kinect 2.0 with Microsoft’s program 3d Scan. This method was identical to the first, however, I actually got slightly better results with the Kinect 1.0 Skanect combo. That could have been due to human error.
Both Kinect options were good baselines, however, I wanted something more accurately. The scanned surfaces with both these techniques looked a little bubbly.
IPhone with Apps
After using Microsoft technology I thought it would only make sense if Apple had something to offer. Plus the new iPhones scan your face every time you unlock it, so I figured I could use that to my advantage. I looked through the app store and found a good option.
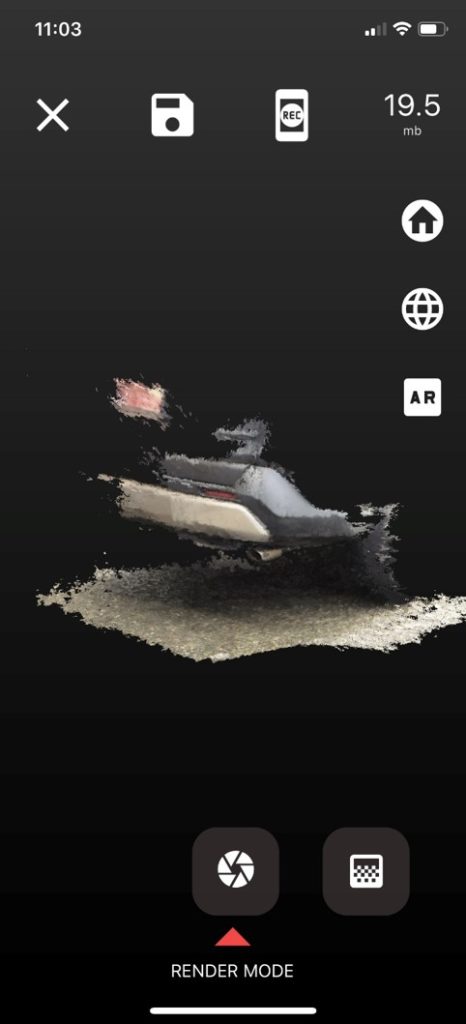
The iPhone worked very accurately, I was impressed! It wasn’t as fast as the Kinect, but super easy to use and very accurate. The app was also flexible by being able to adjust how accurate you wanted it to be. If you didn’t need a tight accuracy you could change it and it would scan a little faster.
The biggest problems I found with this option were it was slow and you could only use the front facing camera. Being limited to the front facing camera made it hard to tell what I was scanning.
Meshroom
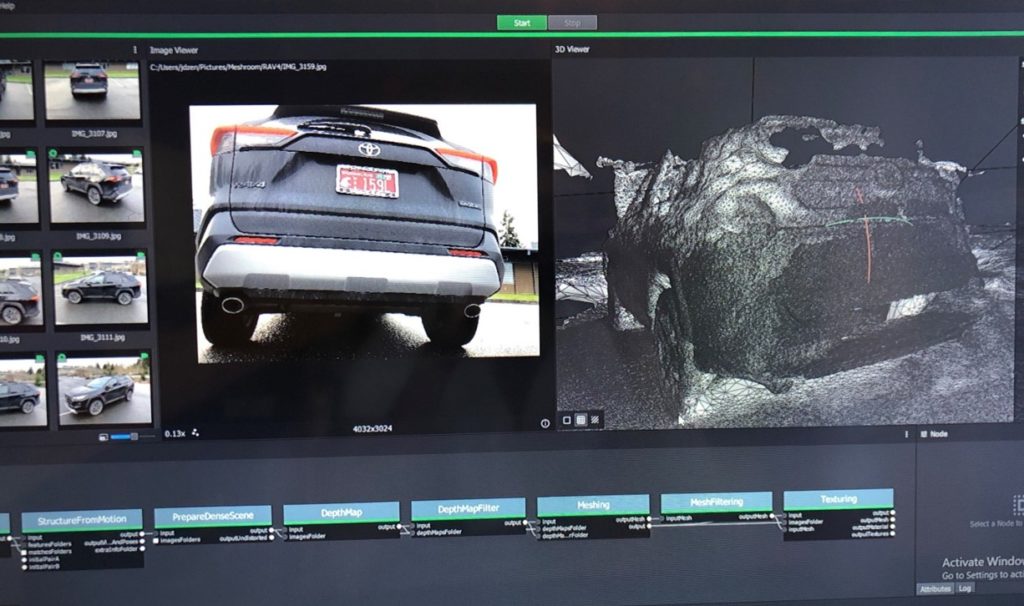
Lastly I found one option that was totally different than the previous choices. It was completely different. Instead of scanning it was photogrammetry. Photogrammetry is when you take pictures of an item from different views and angles and digitally sew the images together to create a 3D model. The software I used is called Meshroom.
Meshroom made photogrammetry simple. I took about 100 images with my iPhone from all different angles and then uploaded them.
My first results from Meshroom weren’t as good as the iPhone/app combo but it was pretty close and much faster.
Comparing the Options
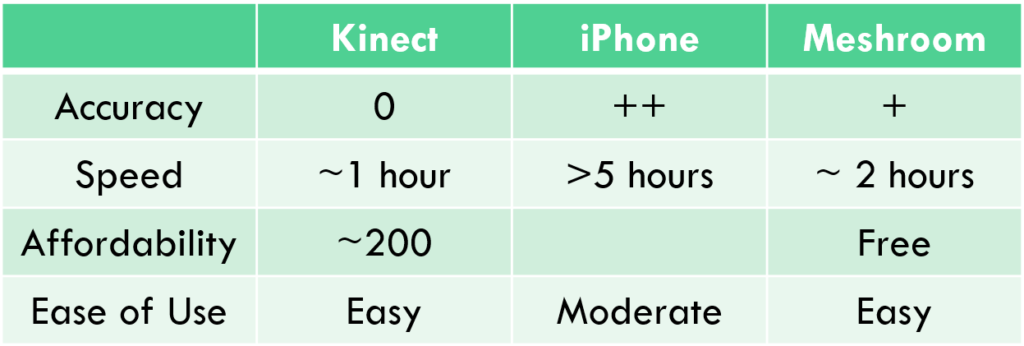
After trying each sample I gathered my results and compared the accuracy, speed, affordability, and ease of use (shown in the the table below). I learned that Meshroom was the best option. After using each technique that was no surprise to me. However, I reviewed my model again from Meshroom and knew it could be better.
Meshroom Trial 2
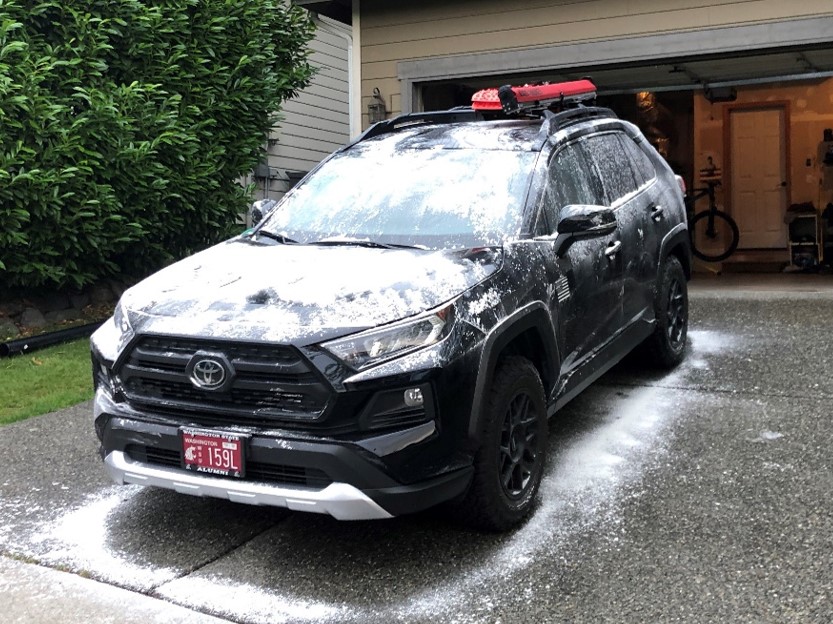
The biggest issue I saw in my previous Meshroom model was the natural daylight created reflections on my car’s surface. If my car had a matte finish this wouldn’t have been an issue, but it’s glossy. To solve this I purchased a bag of baking flour and sprinkled it all over my car. I probably looked crazy to my neighbors but it actually worked very well. If I were to do this again, I’d probably use something else because the flour was annoying to wash off. It clumped up and wanted to stick to my car, but eventually it was removed.
Removing the glare and reflections significantly improved my model, but it still wasn’t where I wanted it to be.
Next I started trying out different cameras and using different angles. I started with using my roommate’s DSLR camera for comparison. I thought this would be an improvement, but Meshroom didn’t like this change. About half of the images wouldn’t upload because the software didn’t know what was the camera’s focal length and couldn’t use it for meshing. Since that idea didn’t work I then looked at what angles to use and how many photos I was uploading. After trial and error I found that using about ~100 – 200 images was the best for the entire car. When I used too much it caused overlapping issues, when I used too little there wasn’t enough detail.
Importing into SolidWorks
Once I had a model I was satisfied with, I imported it into SolidWorks. I learned quickly that Meshroom did not know the scale of my car and imported the model very largely.
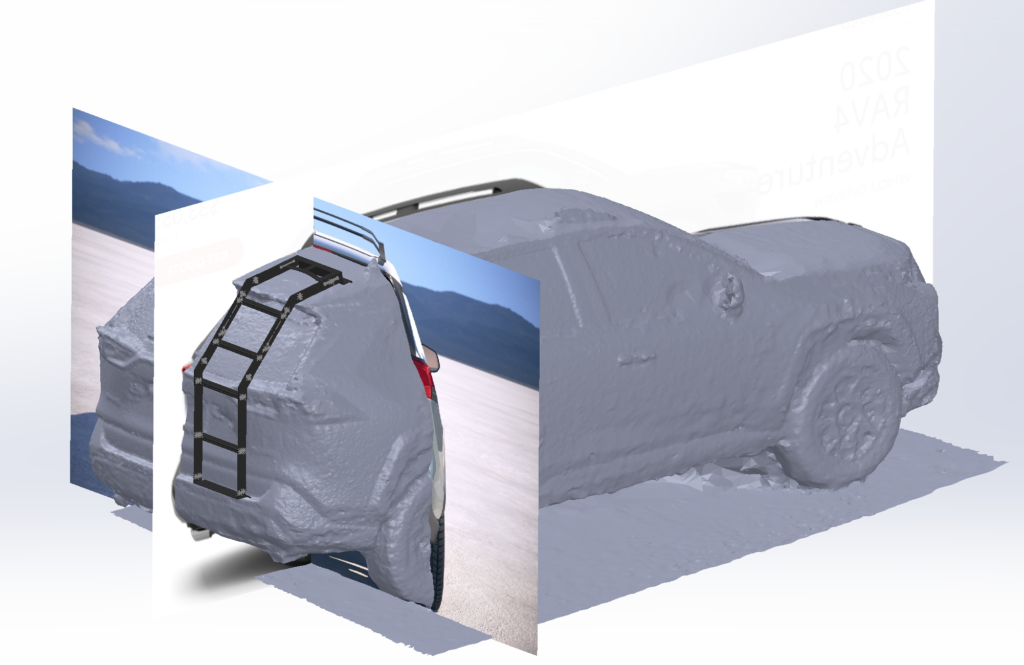
To accurately define the correct scale I found some marketing images that we’re normal to the front, back and sides. I figured that would be more accurate than using my own images. Importing the images into my SolidWorks planes created an orthographic 3D visual for me to accurately scale my model. After correcting the scale I was able to double check with taking basic measurements of my car and comparing it to the model.
Overall, I am very pleased with my 3D model of my car and now ready to start making custom accessories for it!
